Sails

Home
The concept
Versions
Joints
Sails
Other ideas


When designing and making sails, there are several variables to keep in mind:

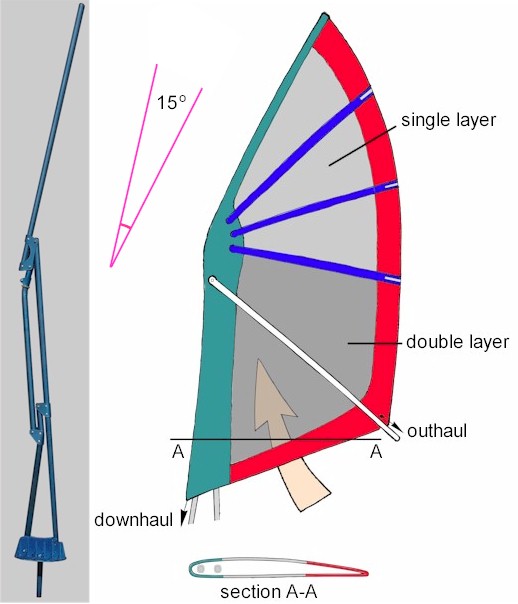
  • the outline and camber (aerofoil shape) of the sail
  • the required area
  • the materials to make it from
  • the method of construction.

In the context of the Transition Rig, sail-making is complicated by the way that the mast extends and folds - the sail has to be able to accept these changes. The sail has to be able to give in certain regions, for example around the upper joints during folding, rather like the skin over the elbow as it bends. If modern inextensible sail cloth is used in those locations it will resist folding and be in danger of tearing - an elastic material is required.

If the variable geometry nature of the Transition Rig is to be used while sailing to alter the profile of the sail in different wind strengths then the whole sail membrane must be elastic. However, the sail must have the capacity to maintain a good aerodynamic shape during shape changes. This is a difficult balancing act - if the sail is too stretchy, it will blow out of shape in stronger winds. If it is not stretchy enough, the trailing edge will go slack as the rig flexes.
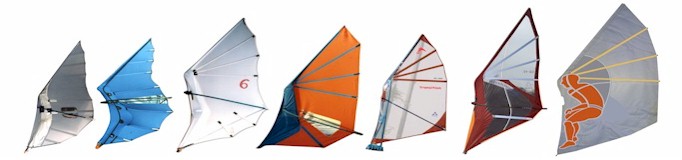
Over the years, I have tried many different approaches to sail making with different degrees of success. Some sails have been made over a 3-dimensional curving surface in order to build in the right amount of camber, and I have experimented with many different types of fabric to find the right balance of elasticity, strength, weight, and UV-resistance.

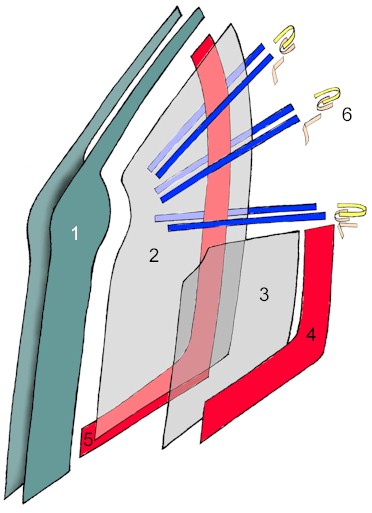
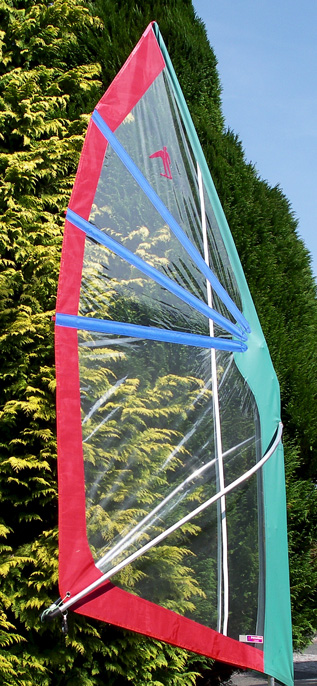
Summarised below is the way that I make sails now. This approach applies mainly to rigs for kayaks, canoes, and dinghies in which the mast is extended and locked into place for sailing and then unlocked and lowered when not required, ie: the variable geometry feature is not used while sailing. (I shall describe variable-geometry sails on 
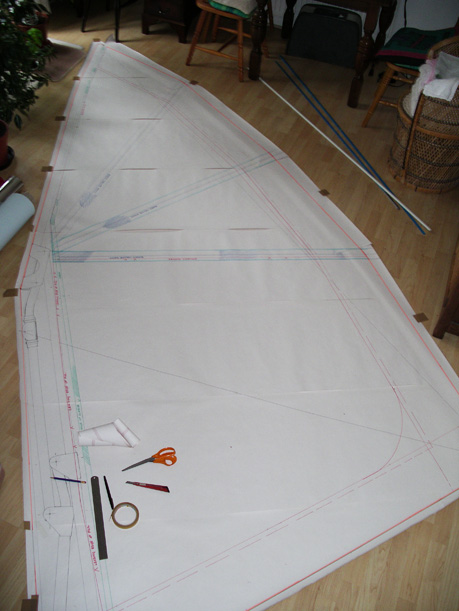
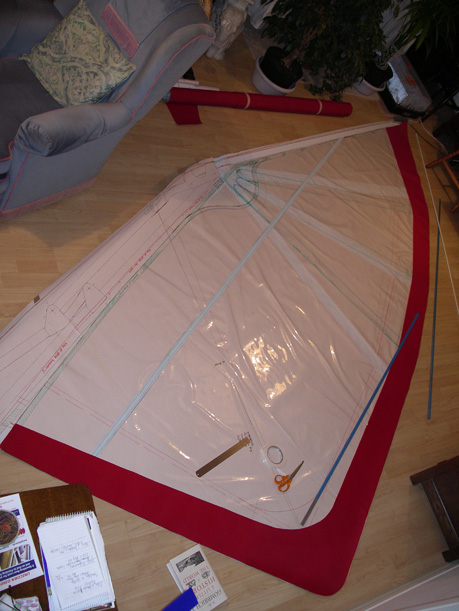
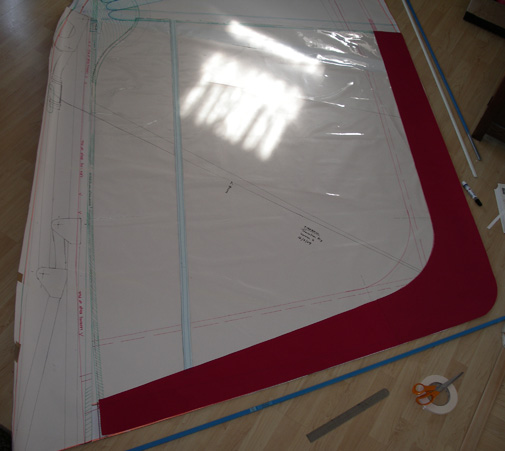
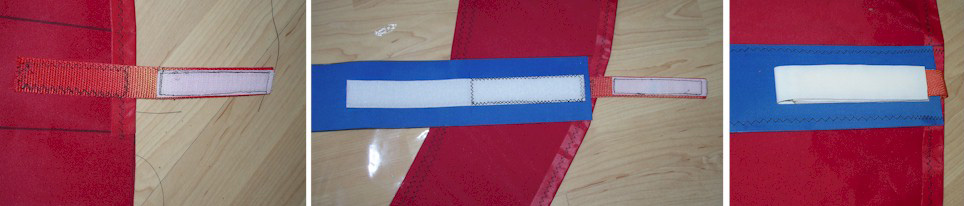
another page.) I have simplified the construction as much as possible and the sails can be cut and assembled on a flat surface such as the 
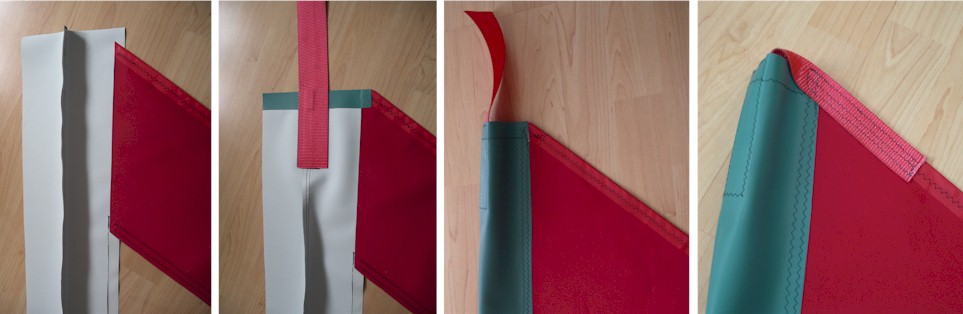
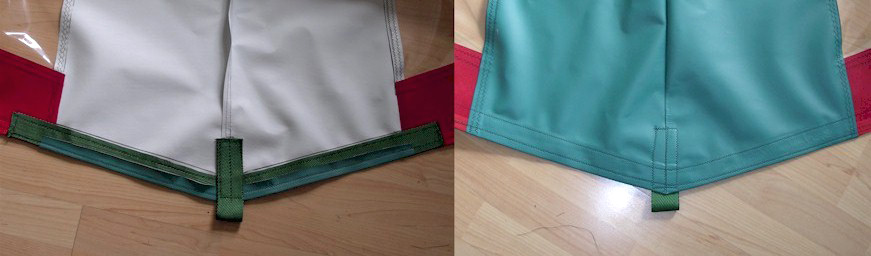
floor. Useful tip: use double-sided tape to stick panels and other materials together before passing them through the sewing machine. This will ensure that the components remain correctly aligned during sewing.


General arrangement of the sail

The mast is completely enclosed within the sail. An unusual feature of the sail is that the lower half from the lowest batten downwards is made up of a double membrane. This arrangement allows the lower sections of the mast to slide easily between the two layers as the mast folds. The top segment of the mast is enclosed in a narrow mast sleeve, rather like that of a windsurfing sail. The trailing edge of the double-layered portion of the sail is stitched closed from the lowest batten down to the outhaul, but left open below the boom.

When designing the sail for a particular mast, a useful tip is to angle the leading edge of the upper part of the sail back more than the angle of the corresponding part of the mast. This is how camber is created in the sail even though it is made flat initially. When the sail is put on the mast and the trailing edge tensioned by pulling on the outhaul, the central part of the sail will have less tension and will form a good aerodynamic curve when sailing. I have shown a 15° rake, but the exact figure will depend on the amount of camber you need and the materials being used.

The leading edge of the sail is tensioned downwards by the downhaul.

Main components of the sail

These are the main components of the sail. (For clarity I have left out the small pieces of cloth and webbing used to reinforce high stress regions such as the outhaul and downhaul eyelets and the mast sleeve top - some of these details can be seen in the following photos.)

The two leading edge panels (1) are made from a stretchable fabric coated on each surface with a polyurethane film. Panels 2 and 3 form the main body of the sail and can be either a transparent film or an opaque cloth. I tend to use a transparent film with slight stretch to give good through-the-sail visibility when sailing. (However, it is possible to use conventional sail cloth such as spinnaker fabric or Dacron for these panels, although they will experience a lot of stress at the front ends of the battens when the sail folds.)

Since the sail is to be used fully extended during use without shape changes, the reinforcing strips along the trailing edge (4, 5) are made of a non-stretch material such as Dacron.

The batten pockets are made from strips of Dacron on each side of the sail with webbing retainers and Velcro fastenings (6).


These are the main steps in making a sail:

1: Design the sail

(Here I am using wall lining paper taped to the floor.)

2: Cut out and join the main panels

Assemble panels (2) and (5). The panels can be joined with double-sided tape prior to sewing.

3: Cut out and assemble panels (3) and (4)


4: Forming the mast sleeve

Place the sleeve panels (1) with their outer surfaces in contact with each other and join their leading edges with two-sided tape before sewing them together. (I use a double line of stitching to ensure that the stitching does not burst as the mast and sail fold.) The mast sleeve can then be opened out so that the seam lies within the sleeve. The assembled panel (2 + 5) can then be attached to one side of the sleeve with double-sided tape and the lower half of the join (below the lowest batten) stitched in place. Panel (3 + 4) can be attached to the lower part of the other side of the sleeve and sewn. The upper and lower ends of the mast sleeve are completed as follows:

The top of the mast sleeve is folded inwards and a length of webbing attached. When the sleeve has been closed by attaching to the other sail panels, the webbing can be sewn to the trailing edge to close the top of the mast sleeve.


The lower end of the mast sleeve is reinforced with webbing and the sleeve material folded inwards before sewing. When the sail has been made, a stainless eyelet (or eyelets) can be fitted through the webbing for the downhaul.


5: The batten pockets

Each batten pocket is made from two strips of Dacron, one strip on each side of the sail. After being attached with double-sided tape, the Dacron strips are stitched along their edges, leaving an empty slot between the sail and one of the Dacron strips so that a batten can be slipped in later. The front end of each batten pocket is stitched closed to provide a stop for the batten. The batten tensioner at the trailing edge consists of webbing with Velcro tape applied around the outer end, and a corresponding strip of Velcro tape attached to the outer end of the Dacron strip. (The Dacron strip is doubled back in this region to strengthen the attachment of the Velcro.)

When the lowest batten pocket is being made, the panel (3 + 4) is incorporated and stitched in place along the lower edge of the pocket.

The two layers of the sail below the lowest batten are sewn together along the trailing edge as far as the outhaul position, and a reinforcing strip of Dacron can be wrapped around the trailing edge and sewn on from the top of the sail down to the outhaul. Each of the two layers of the sail is fitted with a stainless eyelet for the outhaul.

6: Completion

The mast is slipped inside the leading edge of the sail and tension applied to the downhaul. Holes are made in the mast sleeve at the level of the boom attachment so that the boom can be fitted. The outhaul is then tensioned to check the set of the sail. Folding and unfolding of the rig is tested. When the set-up is satisfactory, the rig can be tested on the water.


Home The concept Versions Joints Sails Other ideas