|


| |
|
When a sailing
rig is in use, considerable forces can be generated
throughout the rig by the energy in the wind, and
the forces can change rapidly in degree and
direction. Therefore, if we are contemplating a
jointed mast such as the Transition Rig, we have to
be sure that the joints can withstand the forces
being applied. Also, because the rig will be
extending and folding, as well as rotating about its
vertical axis when in use, we will not be able to
attach stays or shrouds to support the mast - it has
to be free-standing. (The windsurfing version is a
little different in this regard, since the sailor
provides support to the rig by holding on to the
boom.) At the same time, the mast cannot be unduly
heavy, since additional weight higher up would upset
the stability of the craft. Therefore, there are a
number of design issues to keep in mind while
developing the Transition Rig mast. Here I shall
review my experience with different types of joints.
---
|
|
A)
Biology-inspired joints
|
|
 |
|
 |
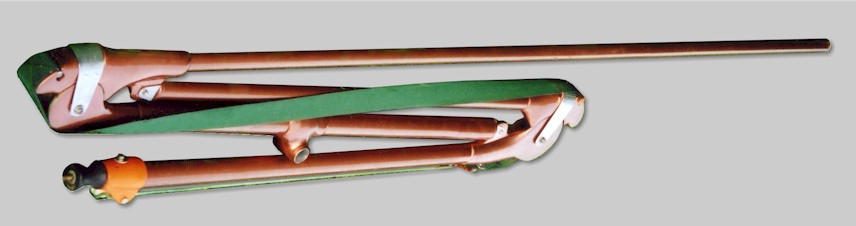
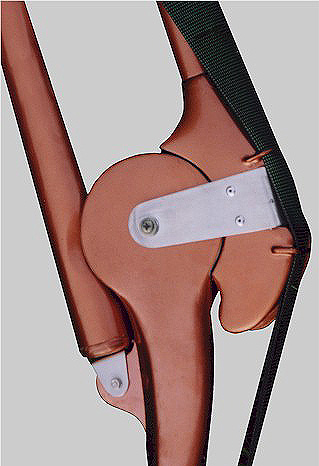
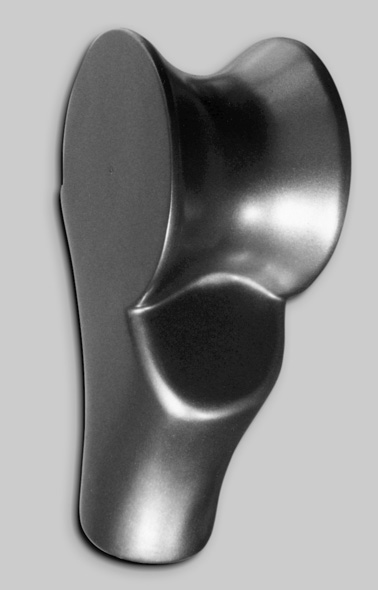
When I began making jointed
masts, I modelled the joints on biological joints. I used deep
concavo-convex articular surfaces for the hinge joints because I
knew from my experience as an anatomist that these were very stable
and could resist twisting forces well. Straps made of aluminium or
thin stainless steel were used to hold the joints together, rather
like the collateral ligaments of a biological joint. To ensure that
the joints were not too heavy, I made them from hollow composite
materials such as glass or carbon reinforced epoxy resin.
Making the joints was very time
consuming. First the exact shapes of the components had to be
modelled in wood, and then moulds were made in which the composite
components could be formed. (Notes on mould-making
here.) It took me several months to create a new mast
using these methods. If I changed any variables in the mast design
as a result of testing I then had to redesign the joints and make
new moulds.
As time went by, I came to the
conclusion that I needed a more rapid way of making masts and joints
so that I could try out ideas quickly and speed up development of
the Transition Rig. I had found that very small changes in the
geometry of the mast, for example the positioning of the joint
pivots, could radically affect the way it worked. I made the
conscious decision to simplify the design as much as possible, and
began making the joints in a different way. This is summarised in
the next section. |
 |
|
|
B)
Simplified joints
|
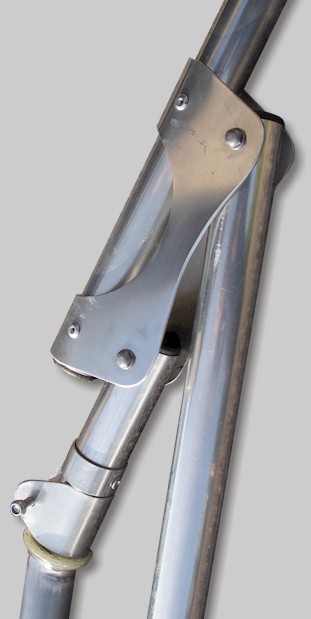 |
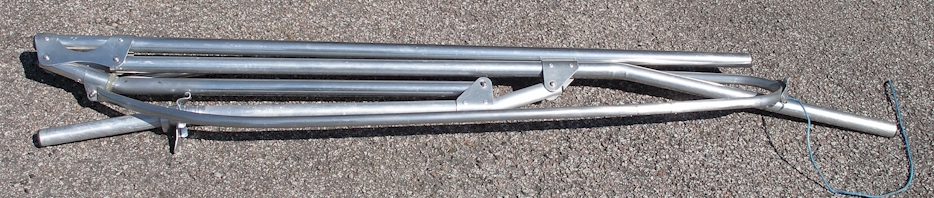
I began to make
joints from thin aluminium plate wrapped around the mast tubes and
pop-riveted in place. In this way, I could quickly change the
geometry of the mast by drilling the pivot holes in different
places, and a new mast could be made in hours rather than months.
The pivots were made from M6 stainless bolts and Nyloc nuts.
To simplify the bending of the
joint plates I made formers to suit the different tube diameters I
was using. First, the plate is cut to size and drilled - the image
below shows an upper joint plate for the 6 sq m rig:
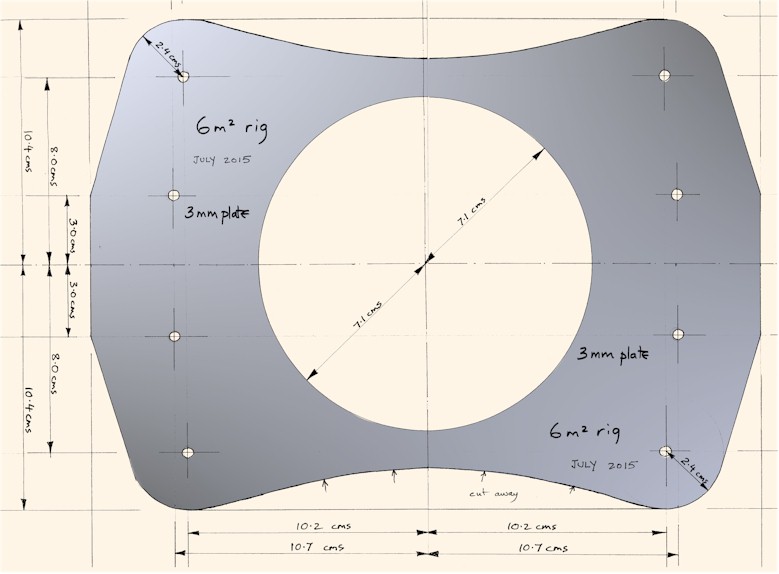 |
| The flat plate is clamped in
position on top of the former and then hand pressure applied to each
side of the plate to begin the bend. When the sides have dropped
below about 45 degrees from the horizontal the whole unit can be
placed upside-down in a vice to continue the bending in a controlled
way until the cheeks of the joint plate are parallel. The plate can
then be attached to the mast tube with pop-rivets. |
.jpg) |
|
 |
The simplified
aluminium joints work well and are very practical. I
have to admit, though, that I like the look of the
biology-inspired joints, and one day, when the
design of the mast has been optimised, I would like
to make myself a mast using them for purely
aesthetic reasons.
|
|
     
|
