|
|
Here
is an overview of the structure of the mast:
|
|
b.jpg) |
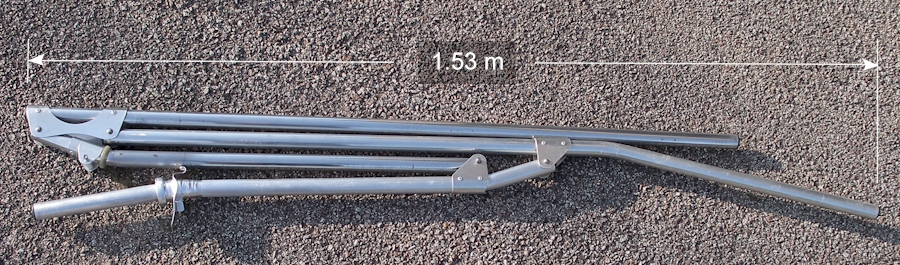
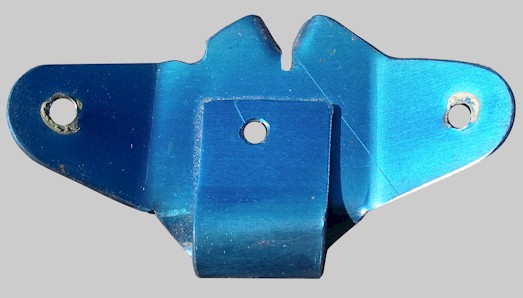
All the mast segments are made
from aluminium tubing with an outside diameter of 28.5mm (1.125")
and a wall thickness of 1.3mm. The joint supports, boom attachment,
and locking plate at the base of the mast are made from aluminium
sheet 2mm thick. The joint supports are pop-riveted to the mast
segments with 4mm diameter rivets. The pivot bolts are M5 (5mm
diameter) and 42mm long, held in place with Nyloc nuts. Plastic
end-caps close the ends of the mast tubes. |
a.jpg) |
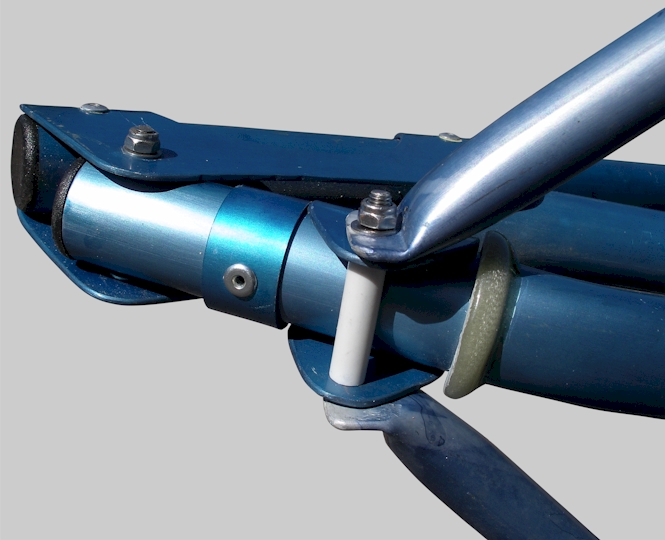
| The boom attachment consists
of a U-shaped collar from 2mm aluminium curved around the mast with
a tube crossing in front of the mast and a 5mm diameter rod passing
through the tube and collar, threaded at both ends to receive Nyloc
nuts that hold the boom in place. Stops above and below the collar
hold the attachment in place on the mast whilst allowing it to
rotate. (The rotation occurs when the mast and sail change from tack
to tack.) |
a.jpg) |
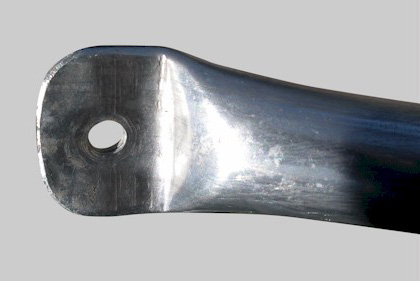
| The distance between the pivot
bolts is the same for the lower joints and the upper joints. Small
differences in these measurements will affect the final geometry of
the mast. When assembling the mast, it is best to place all the
components in the fully-folded position before drilling the holes
for the pivot bolts. |
a.jpg) |
| There needs to be a lock to
hold the mast in its fully-extended configuration. In this example,
a stainless spring-loaded locking pin engages with a hole in a plate
attached to the mast at deck level. The mast tubing
extending below deck level drops into a tube fitted to the kayak
(see below). |
a.jpg) |
|
Here is a view of the folded mast: |
|
 |
|
The
mast is fitted to the kayak in the following way: |
 |
To fit the mast support tube
to the kayak, drill a hole through the foredeck and insert the tube,
anchoring it to the floor of the kayak. The internal diameter of the
support tube should be large enough to allow the mast to drop in
and then rotate freely. |
 |
|
|
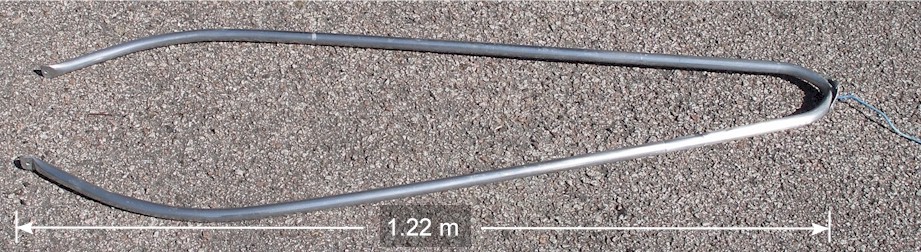
B) Boom
For simplicity's sake, the boom for the 2
sq m kayak and canoe rig is made from a single length of
3/4" outside diameter aluminium tubing. The mid-region
of the tubing is bent into a tight curve to form the
tail end of the boom, and a plate attached for the
outhaul and main sheet. The front ends of the boom are
curved to shape and crimped where they articulate with
the mast. The overall length of the boom will be
determined by the dimensions of the sail and the exact
positioning of the boom - the measurement given here is
for guidance only.
|
|
 |
|
To
obtain smooth, repeatable curves towards the front of the boom, it
is worth making a former something like this:
.jpg)
Since the tube will tend to spring
back to a more shallow curve after bending, it will
need to be slightly over-bent down to the adjustable
stop to obtain the required curvature on release.
|
|
 |
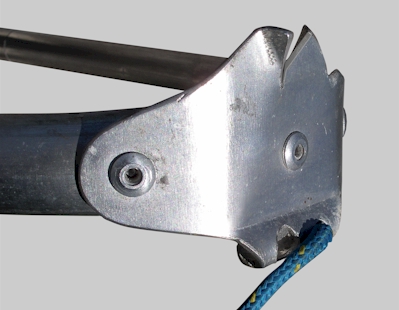
The tail-end plate provides a
simple cleat for the outhaul (the rope that tensions the back of the
sail) and anchorage points for the outhaul and mainsheet ( the rope
that trims the position of the sail when sailing). The plate is held
in place by three pop-rivets. |
|
 |
The front end of the boom is
flattened, angled, rounded, and drilled to accommodate the bolt by
which it is attached to the mast. |
|
 |
The front end of the boom is
attached to a U-shaped plate that swivels around the mast tube. The
5 mm diameter stainless rod (threaded at both ends) for the boom
attachment passes through a tube in
front of the mast.
USEFUL TIP: position the boom attachment as
close as possible to the mast joint above, bearing in mind that the
mast still has to be able to fold completely. The reason for this
positioning is to minimise additional tension on the sail
as the mast folds. If the boom attachment is placed lower on the
mast, the tension while folding will increase, and the sail may
tear unless the outhaul is released. This tip applies to free-standing rigs for kayaks, canoes, and
dinghies. (The positioning of the boom on a windsurfing version of
the Transition Rig is dictated by the size of the sailor and their
preferred position for the boom, so this is a special case and will
be discussed on a different page. I will add a link when I have
written this section.) |
|
For
advice on how to make the sail, please click
here.
|
|
